
Just a tease to let y'all know that there's big news on the way in about two weeks.
I think you'll like it.
Showing posts with label gutshot. Show all posts
Showing posts with label gutshot. Show all posts
Tuesday, January 3, 2017
Wednesday, May 21, 2014
Deadwood - Rex Sees Something
I took another stab at the Rex image from last week, and I'm still not happy with it. The composition and lighting are still way off.
Now that I've got a decent contrast between his beard and shirt, I've got to increase the contrast between his shirt and britches. In color, they are too similar in tone. Right here, with this quick inking conversion, I compensated for that by using two different techniques: His upper body is Basket Weave and his lower body is inked with Cutline. Both of these are settings in the Photoshop India Ink filter by Flaming Pear. To get a clear look at the effects, click on the above image to see it full screen.
Right now I've got to decide if this image is worth pursuing, or if I should go back to my original idea of using the Wolf Willis character, instead. No matter what I do, though, the lighting and composition (i.e. how the figures are framed) need work.
Oh, and that fire pit looks HUGE at this angle. I definitely need to shrink it down a bit.
 |
| Turning his head, Rex watched as a hideous shape emerged from the shadows... a shape that was hauntingly familiar. |
Right now I've got to decide if this image is worth pursuing, or if I should go back to my original idea of using the Wolf Willis character, instead. No matter what I do, though, the lighting and composition (i.e. how the figures are framed) need work.
Oh, and that fire pit looks HUGE at this angle. I definitely need to shrink it down a bit.
Wednesday, May 14, 2014
Deadwood - Rex Hears Something...
This week has been tied up with a lot of work and other projects, so I'm actually very behind on creating art for the Night of the Living Deadwood book. However, I did get a start on a new image... one that's surprised me in more than a few ways.
You see, I originally pictured this scene with Wolf Willis, reaching for his pistol which would be in a gunbelt draped over the log. Instead, I found myself using a new character named Rex... an old frontiersman/prospector character with a bald head and a long beard. I also found myself using a lot more props this time around. Often, I add trees and logs in post-production (that is, I don't put them into the scene, but add them in Photoshop).
The other images I've shown you were mostly completed (if used, some will be tweaked before being printed). But this time I decided to bring you in at the early stage and show you the first step in the process. This is a low-resolution, low-quality rendering of the basic scene. Right now I'm just putting things in their rough location and doing a rough pose on which to start building. In other words, this is the digital equivalent of a sketch.
As such, there's no ground, nothing around the tree, and most of all, nothing lurking between the trees. This is a simplified scene with just the basic elements that I need. For instance, I need the campfire for a light source (and it comes from a low angle, so that will make it more ominous). I need the log as something to lean the rifle up against. I could have it lying on the ground, but that would make it hard to see and that location would require him to lean over to reach it. Not practical for a still image. The tree behind him could be done in post (i.e. Photoshop), but I want it to be more solid, so I'm actually putting it into the scene. I will use it and the branches of the smaller tree to frame a zombie that is coming up behind him.
I'v already made a few decisions regarding changes:
You see, I originally pictured this scene with Wolf Willis, reaching for his pistol which would be in a gunbelt draped over the log. Instead, I found myself using a new character named Rex... an old frontiersman/prospector character with a bald head and a long beard. I also found myself using a lot more props this time around. Often, I add trees and logs in post-production (that is, I don't put them into the scene, but add them in Photoshop).
 |
| There was a noise behind him. Instinctively his hand stretched out for his trusted Henry rifle... |
The other images I've shown you were mostly completed (if used, some will be tweaked before being printed). But this time I decided to bring you in at the early stage and show you the first step in the process. This is a low-resolution, low-quality rendering of the basic scene. Right now I'm just putting things in their rough location and doing a rough pose on which to start building. In other words, this is the digital equivalent of a sketch.
As such, there's no ground, nothing around the tree, and most of all, nothing lurking between the trees. This is a simplified scene with just the basic elements that I need. For instance, I need the campfire for a light source (and it comes from a low angle, so that will make it more ominous). I need the log as something to lean the rifle up against. I could have it lying on the ground, but that would make it hard to see and that location would require him to lean over to reach it. Not practical for a still image. The tree behind him could be done in post (i.e. Photoshop), but I want it to be more solid, so I'm actually putting it into the scene. I will use it and the branches of the smaller tree to frame a zombie that is coming up behind him.
I'v already made a few decisions regarding changes:
- I need to shift our Point of View (POV) to our left and rotate it so we get a better look at Rex's face.
- I need to raise his arm so we can clearly see it reaching for the rifle
- I need to put a coffee cup in his right hand (just to give it something to do)
- And, if I have one, put a coffee pot in the fire (gotta explain what's in his cup)
- I need to alter the pose of his feet so they don't touch
- I might need to make his shirt darker so his beard stands out better
 |
| A closer view with different lighting. Things were way too bright in this scene, so I toned it down, as you can see in the render above. |
Anyway, those are just a few of the thoughts I've had regarding this scene so far. Hopefully, I'll manage to get back to this before next week and show you how I've progressed. Until then... keep yer powder dry, saddle pals!
Wednesday, May 7, 2014
Deadwood - Art Preview: Hungry for Revenge
Arizona pulled back on the reins and the horse came to a gentle stop. She sat still in the saddle -- a few pebbles bounced on the ground -- the last movement from hooves on a rocky ground. Monty's tail made a gentle swishing sound and he cocked his head, wondering why they had stopped here, where there was no grass or water. Taking cues from his mistress, it sensed her anxiety and snorted, turning his head to look first one way, then another.
Arizona shushed the horse -- listening intently. At first, it was too quiet. Not even a buzz from flies or bugs. Then she heard it. Falling rocks... something dragging in the dirt, loosening a spray of pebbles and debris from the ridge to her right. And a shadow fell upon her then, but that wasn't why her skin turned to goosebumps and ice grew on her heart. The skin was rotting and dry, eyes sunken but still burning with hate. And if she had any doubt who it was, that vanished when she saw his hand. It was in a bar in Tombstone where she herself had cut off the little finger on his gun hand. Right before she gutted him.
Cole Black had risen from the dead... and he hungered for revenge.
Another illustration for the upcoming miniatures game, GUTSHOT: NIGHT OF THE LIVING DEADWOOD. This time I experimented with a slightly different style. This isn't quite perfect, but I think it's a good direction. I will definitely be continuing my experiments down this avenue. As with other illustrations in this series, this is rendered in color in Daz Studio 4.6 and then converted to b&w in Photoshop.
Tune in next wee for more glimpses of the dark side, as I continue to work on nailing down the look and feel of the artwork for our cowboys vs. zombies miniature game.
Arizona shushed the horse -- listening intently. At first, it was too quiet. Not even a buzz from flies or bugs. Then she heard it. Falling rocks... something dragging in the dirt, loosening a spray of pebbles and debris from the ridge to her right. And a shadow fell upon her then, but that wasn't why her skin turned to goosebumps and ice grew on her heart. The skin was rotting and dry, eyes sunken but still burning with hate. And if she had any doubt who it was, that vanished when she saw his hand. It was in a bar in Tombstone where she herself had cut off the little finger on his gun hand. Right before she gutted him.
Cole Black had risen from the dead... and he hungered for revenge.
 |
| Cole Black is back! Click on image to see it full-size. |
Another illustration for the upcoming miniatures game, GUTSHOT: NIGHT OF THE LIVING DEADWOOD. This time I experimented with a slightly different style. This isn't quite perfect, but I think it's a good direction. I will definitely be continuing my experiments down this avenue. As with other illustrations in this series, this is rendered in color in Daz Studio 4.6 and then converted to b&w in Photoshop.
 |
| I'm ready for my close-up! Ugh. Not even a mother could love this face! |
Wednesday, April 30, 2014
Deadwood - Zombie Crawling Revisited...
 |
| Another day, another creature feature! Here's another take on our friendly fiend. |
Last night I did a quick revisit on good ole Mr. Happy, and I must say, I'm happier with the results. I used a different technique on him -- splatters instead of basketweave -- and I like the results a lot more. I also got rid of that bad background.
This is a definite improvement. Next up, I'm going to take a look at making the edges rougher and maybe adding some rough hair. I'm also going to look at manually inking a version of it (or another image).
Stay tuned for more behind-the-scenes action.
Wednesday, April 23, 2014
Deadwood - Zombie Crawling
I hate to say it, but I think this week's testis another swing and a miss.
There are a few things I like about this image, but just a few. There's something wrong with the way his torso is flowing down into his waist. Honestly, it looks like he's got really saggy boobs. I tried tweaking it, but never got the results I wanted.
I may just have to put this one down to being a bad pose and leave it at that. Also, I really cut corners on the background -- and it shows. The foreground tree is okay, but the background's tangled branches really don't work for me. Alas, I knew I was cutting corners when I did it and knew I wasn't going to fix it later. There just isn't time to spend on something you know isn't going to work out.
As before, this is the Mr. Happy character for the Michael 3 figure. All post work was completed in Photoshop, with the bulk of it being performed by the Flaming Pair India Ink filter.
NEXT WEEK -- Another attempt at another zombie.
 |
| You wake from a deep sleep... the horses are skittish. Something is rustling in the underbrush. You roll over, expecting to see a raccoon or maybe a skunk. You never expected THIS! |
There are a few things I like about this image, but just a few. There's something wrong with the way his torso is flowing down into his waist. Honestly, it looks like he's got really saggy boobs. I tried tweaking it, but never got the results I wanted.
I may just have to put this one down to being a bad pose and leave it at that. Also, I really cut corners on the background -- and it shows. The foreground tree is okay, but the background's tangled branches really don't work for me. Alas, I knew I was cutting corners when I did it and knew I wasn't going to fix it later. There just isn't time to spend on something you know isn't going to work out.
As before, this is the Mr. Happy character for the Michael 3 figure. All post work was completed in Photoshop, with the bulk of it being performed by the Flaming Pair India Ink filter.
NEXT WEEK -- Another attempt at another zombie.
Wednesday, April 16, 2014
Deadwood - More Zombies

A Work In Progress {WIP} of the zombie horde
This week's sample image is definitely not going to make into the final book. I put more work into this image that I should have spent on it, especially considering that I'm not pleased with the results. In fact, I almost consigned it to the trash heap, but decided it's worth showing even the failures.
Let's call these guys, from left-to-right, Zed and Hap.
Zed is based on the high-resolution 3D model "Long Time Dead" that is available from Daz3d.com. This has a lot of texture detail and a very high polygon count. He's the zombie that attacked Sheriff Mike Foreman in last week's blog post.
Hap is based on a low-resolution figure for the Michael 3 base model, and he's called Mr. Happy.
Now, if all this 3D talk is making your head spin, fret not. I'm just including it for the 3D enthusiasts who follow this blog. The rest of you can just look at this and go, "Yeah, sometimes you nail it, and sometimes you hit your thumb with the hammer."
The problems I'm having are with the skin tones. I'm not getting them to convert to inked patterns correctly. Plus, all the detail on Zed makes him a VERY slow figure to work with. I honestly can't imagine how slow the system would run if I had two of these in the same scene. Plus, the texture on his face has these huge black spots around his eyes and mouth. This looks good in color, but in b&w he looks like Rocket Raccoon's evil grandpa. And don't get me started on those Gary Busey lips of his...
Mr. Happy, on the other hand, makes my computer's CPU VERY happy. He's a very quick figure to work with, and I can imagine that 5-8 of him in one scene would not cause too many problems. But, I'm having a heck of a time getting clothes to fit him properly. His knees keep sticking out of his pants, for example. And I have yet to get any hair on him, nor a shirt that fits. I can get a cowboy hat on his head, but if he's just wearing tight pants and a cowboy hat, he kinda looks like an undead stripper.
Artistically Speaking
Getting down to the art itself, I don't like the poses or lighting in this scene. I think the background is okay, but other than that, I just don't like it. I suppose if I dropped Zed it wouldn't look quite as bad. Hap kind of has this look like he was walking in the grave yard and just heard someone breathing behind a wall, so he's about to go over and try to make lunch out of him. But with Zed there, both poses seem more comic than menacing.
After the poses, I hit the inking effects, which are too heavy on Zed and not quite right on Hap. And that unevenness, by the way, is a big part of the reason that I included them both in the same image. I need to standardize their appearance so the figures have the same look and feel throughout the book.
Here's hoping that I can pick things up next week. Because, yes, I intend to be back again next Wednesday with another post. I'm going to try to keep this up for at least another month as a way of motivating myself to stay focused on this aspect of bringing GUTSHOT: NIGHT OF THE LIVING DEADWOOD to press by next year.
See you next week, fear fans!
Wednesday, March 26, 2014
Deadwood - Wolf Willis art preview (part 2)
I was talking to Paul "Mad Dog" Mauer the other night about the artwork for the upcoming Deadwood book (he gets all flustered if I use the full name, Gutshot: Night of the Living Deadwood, in conversation). He likes the look of the final artwork I'm showing, but asked to see what it looks like before I convert it to black & white line art.
To back up a second, the images I'm creating start out in a 3D program called Daz Studio. I'm currently using the latest release, which is version 4.6. This is actually a free program created by a company called Daz3D. I've been a customer of theirs for more than a decade, although I used to just buy content from them. You see, they started out making figures, clothes and hair for a 3D program called Poser.
Both of these are considered entry-level 3D programs and they have tens of thousands of users around the world. Now, to digress for one second, if you're knowledgeable about 3D software you might ask why I'm not using a high-end application like Maya, 3D Studio Max or even Lightwave, or something in the middle like Carrara or even Strata 3D or Blender. The simple answer is, those are bigger than I need.
I'm not creating animations, nor am I modeling my own figures and props. Frankly, there's already a huge collection of props and figures that have been created by professional (and semi-pro) designers out there for use in Daz Studio and Poser. Rather than waste time reinventing them, I've chosen to buy (or simply obtain free models, because there are thousands of freebies out there) and compose them into scenes that I can then use to illustrate the upcoming Deadwood book.
And there's a LOT of manipulation involved. These models do not just magically transform into the black & white line art I'm previewing here. There's no simple mouse-click to do the conversion. It takes a combination of my eye and experience to go from the original render to the final image.
But, to answer Paul's question, here's a look at what I'm actually starting with. As you can see in this animated GIF, the Daz Studio software deals with wireframe 3D meshes that are then covered with textures.
As 3D meshes, these have been pre-rigged, meaning they have "bones" that let them move at the joints just like people (and dogs) do. Each finger, toe, eyelid, mouth, etc. can also be moved to grasp the rifle and make the face look different (the same figure, for example, could look like different people just by adjusting the chin, cheek bones, hairline and body type). I can also move the camera around so that we can see them from different angles (I could easily switch this to a side view, or do a close-up on the dog's face. Likewise, I can adjust the lighting (in this case it comes from below to add a hint of drama to the scene).
I don't want to get into a big discussion on 3D or what my process is to convert the artwork to b&w, but if you're interested, let me know and I'll post more info about it.
Check out last week's post for a look at the final version of this image.
To back up a second, the images I'm creating start out in a 3D program called Daz Studio. I'm currently using the latest release, which is version 4.6. This is actually a free program created by a company called Daz3D. I've been a customer of theirs for more than a decade, although I used to just buy content from them. You see, they started out making figures, clothes and hair for a 3D program called Poser.
Both of these are considered entry-level 3D programs and they have tens of thousands of users around the world. Now, to digress for one second, if you're knowledgeable about 3D software you might ask why I'm not using a high-end application like Maya, 3D Studio Max or even Lightwave, or something in the middle like Carrara or even Strata 3D or Blender. The simple answer is, those are bigger than I need.
I'm not creating animations, nor am I modeling my own figures and props. Frankly, there's already a huge collection of props and figures that have been created by professional (and semi-pro) designers out there for use in Daz Studio and Poser. Rather than waste time reinventing them, I've chosen to buy (or simply obtain free models, because there are thousands of freebies out there) and compose them into scenes that I can then use to illustrate the upcoming Deadwood book.
And there's a LOT of manipulation involved. These models do not just magically transform into the black & white line art I'm previewing here. There's no simple mouse-click to do the conversion. It takes a combination of my eye and experience to go from the original render to the final image.
But, to answer Paul's question, here's a look at what I'm actually starting with. As you can see in this animated GIF, the Daz Studio software deals with wireframe 3D meshes that are then covered with textures.
 |
| From mesh to man, this series of screen shots from Daz Studio show how detail is slowly added to the figure to bring it to life. |
As 3D meshes, these have been pre-rigged, meaning they have "bones" that let them move at the joints just like people (and dogs) do. Each finger, toe, eyelid, mouth, etc. can also be moved to grasp the rifle and make the face look different (the same figure, for example, could look like different people just by adjusting the chin, cheek bones, hairline and body type). I can also move the camera around so that we can see them from different angles (I could easily switch this to a side view, or do a close-up on the dog's face. Likewise, I can adjust the lighting (in this case it comes from below to add a hint of drama to the scene).
I don't want to get into a big discussion on 3D or what my process is to convert the artwork to b&w, but if you're interested, let me know and I'll post more info about it.
Check out last week's post for a look at the final version of this image.
Wednesday, June 12, 2013
S&S Update: Graphics and typesetting coming along
I've been working on the Showdowns & Shootouts book for a few days (off and on). It's now my "after hours" project and I'm trying to get as much done as I can each evening after work, or during the day during downtime.
So far I've got the Table of Contents, Intro, and the the first adventure set up.
I know this doesn't sound like much, but the first adventure includes all the typesetting and design decisions that will be used throughout the rest of the book. So, from a technical viewpoint, this is pretty big.
Yesterday and today I finally settled on the icon and treatment we will use to reference the Online Components to the book -- that is, the PDF Maps Packs and character sheets that are on the Website. Although we'll include thumbnails of these in the book, we're not going to reprint them in the entirety because they would really be a waste of paper.
After all, each adventure includes all the character stats, weapons and info, so even if you didn't have access to the online character sheets you could fill out your own.
The Map and River Packs from the later adventures will be covered a bit more fully in the book, but we still won't be reprinting each and every tile (there are 9 tiles in Dion Duran's "I Hit a Vein!" adventure). There's just not enough value to be had by printing each of the tiles -- but of course, we'll print the one-page map overview.
Anyway, things are definitely picking up steam. Once I finish the page with the online references for Al's adventure, I'll move on to the next. And that one (and the subsequent adventures) will definitely go much faster than the first.
I'll keep you posted as we make progress!
So far I've got the Table of Contents, Intro, and the the first adventure set up.
 |
| This little fella will be part of our page treatment for the online resources in the Showdowns & Shootouts book. |
Yesterday and today I finally settled on the icon and treatment we will use to reference the Online Components to the book -- that is, the PDF Maps Packs and character sheets that are on the Website. Although we'll include thumbnails of these in the book, we're not going to reprint them in the entirety because they would really be a waste of paper.
After all, each adventure includes all the character stats, weapons and info, so even if you didn't have access to the online character sheets you could fill out your own.
The Map and River Packs from the later adventures will be covered a bit more fully in the book, but we still won't be reprinting each and every tile (there are 9 tiles in Dion Duran's "I Hit a Vein!" adventure). There's just not enough value to be had by printing each of the tiles -- but of course, we'll print the one-page map overview.
Anyway, things are definitely picking up steam. Once I finish the page with the online references for Al's adventure, I'll move on to the next. And that one (and the subsequent adventures) will definitely go much faster than the first.
I'll keep you posted as we make progress!
Thursday, July 26, 2012
Get Gutshot at Noble Knight Games
 We want to say a big "Howdy" to our newest retailer, Noble Knight Games. Aaron and the fine fellas over there are now carrying Gutshot and -- for the first time ever -- our Deadwood miniatures and our Lethal Ladies Gunfighters miniatures. In short, they are carrying all of our Gutshot and Gutshot: Night of the Living Deadwood material.
Noble Knight is one of the coolest online stores we know of. Not only do they carry the latest games, but they also stock hard-to-find games that have been out of print for ages. Heck, they even have more than one copy of TSR's original Boot Hill game available (I'd snatch it up in a second if I had an extra $150 burning a hole in my pocket).
To visit them, check 'em out on the Web: www.nobleknight.com
To check out all our retailers, visit our Website: http://hawgleg.com/retailersList01.asp
PS: We just shipped our stuff to Noble Knight, so it may take a few days to show up in their catalog.
Thursday, May 31, 2012
Artwork Update
Today I took a break from a few things and decided to work on some artwork. I'm not really in love with the pose I selected, but that's not really the point. I was more interested in technique and working with the software today than in the final results.
Right now this is just a Work In Progress (WIP), but when I finish it this image will probably wind up in one of our books in the future.
For this sample, I added the brown tint and the brown squares just to give it a sense of balance. The final artwork will -- of course -- be printed only in black & white.
See you here next week!
Right now this is just a Work In Progress (WIP), but when I finish it this image will probably wind up in one of our books in the future.
 |
| Click to see full sized. |
For this sample, I added the brown tint and the brown squares just to give it a sense of balance. The final artwork will -- of course -- be printed only in black & white.
See you here next week!
Thursday, May 17, 2012
Showdowns & Shootouts Update
As I mentioned Tuesday, I've started making some preliminary cover sketches for the cover, and I've started work on the interior pages templates. Next up, moving the individual adventures into the book itself.
Why Release an S&S Book?
Mostly it's so we have something extra to give to the people who took the time and effort to submit the adventures. But there's something more. I like books.
I like that they are permanent and are not dependent on technology to read. Everyone thinks a PDF is a a permanent format, but let's be honest. That format could be replaced tomorrow and be out of fashion in 10 years. That would mean all those existing PDFs would be dependent on a defunct technology. Is that likely? No. Possible? Yes.
So, that's another reason I like books. Plus, as a hard copy, it will work when technology fails (nothing worse than having your tablet run out of power while you're running a game -- paper never runs out of power).
Finally, books are still cool and they look great on your book shelf.
However, we're probably not going to stick with just a book. Even as we keep the original adventures online for free, we're going to experiment with having the collected PDF available for a very small price online (probably through DriveThruRPG.com). Both the printed and online books will have a little additional material:
- Summary sheets of new Specialties that are introduced in the adventures
- Summaries of new vehicles (raft and mule cart)
- Summary of the new tables for random weapons and random lawmen
- New Random Character Generator
- Index
- Some other fun stuff
This info will be probably be added to our Downloads section at the Website (which means it's free).
As you can see, the goal of the S&S book is just to collect the material, not make a lot of money. Still, if we sell a few hundred copies... well, I don't think anyone here would complain!
Talk to ya'll next week!
Thursday, May 3, 2012
Arnica Sneak Peak: New Shed Design
Not much to report right now. My thumb is getting better and I've resumed my normal work schedule of casting parts and tooling (i.e. sanding) them. Orders are shipping and things are moving forward. The position of the cut does make it hard to mix mold rubber, though. Silicon rubber is very thick and holding the mixing rod puts a lot of pressure on my thumb -- exactly on that cut. So I won't be making any new molds for a few more days, yet.
When it heals I'll be focusing on making replacement molds for a few damaged parts, as well as making extras of key parts (like the wall of the bank, for example -- right now I've only got one mold for both walls and a second wall would really come in handy). After that, I'll move on to making some new molds for some new buildings, including the long-awaited Adobe collection.
We'll also be offering a new building for a set of original designs I've started working on: The Miner's Camp. You see, when we add the adobe buildings to our set, we'll have most of the major buildings that you need to create a nice Western town. The keyword being "nice." I'd like to add some more buildings that aren't so nice, nor so big. In other words, I want to create a set of small shacks and shanties like those you might find in a mining camp.
Here's a look at the first building I've designed (which, obviously, is based on our current Attached Shed).
 |
| New Shed Design |
This photo shows the master pieces glued to a board that will serve as the basis of the master mold. As you can see, it will have a slopped roof with one end higher than the other. I'm hoping this will create a dramatic profile when compared to the other buildings in the town. Also, the flat roof (to the left) could serve as a place for outlaws to wait while ambushing people -- if the slope doesn't prove too steep, that is.
I'm also hoping that this model will offer a little variety to the various board & batten buildings we currently have. Also, it's a very small building, so it's low cost should prove to be popular. I've no idea yet when this will be released, but probably sometime this month. I'll keep you posted.
Remember, you can buy all of our Western Buildings at the Arnica Website.
See ya back next week for more behind-the-scenes fun.
Thursday, April 19, 2012
Arnica: Lights, Camera... Bubbling Rubber!
I've been busy this week on all things Arnica Real Estate. Not only did I get the new mold for the Boardwalks made, I also made a replacement mold for the side walls to the board & batten buildings. These molds got ripped to shreds last Christmas. One wall went because of malfunctioning mold release agent and the other went due to an error mixing resin. Mostly, though, they went because they were old and had outlived their capacity.

While I was making that mold, I whipped out my trusty camera phone and shot a short video of what the rubber looks like while we're sucking the air out of it in the vacuum chamber. It's not much of a video (just 2 minutes), but I think you'll all get a kick out of watching the rubber bubble around as it "came alive."
If you'd like to watch it over at YouTube, Click Here.
More About Molds
You see, molds don't last forever. As they age they get brittle and lose the slickness that is necessary for the easy removal of the cured resin. Without this slickness, the mold fails and tears when you pull out the finished piece. One question that's been asked a lot is, "How long do these molds last?"
 |
| The Arnica Work Table |
Well, pilgrim, there ain't no good answer for that. You see, we use different types of silicone mold rubber and they each have different properties. As you can see in this picture, we use three types of rubber: purple, green and yellow.
Yeah, I know it's more of a teal or a turquoise or soa foam... I'm a guy working with chemicals and power tools. Right now, I'm just going to call it "green."
Each of these is slightly different. The yellow is made by a major company called Alumilite. We use their Quick Set Mold Silicone which sets in about half an hour (and completely solidifies in 4 hours). This is a good, fairly stiff rubber that is good for holding details and is justly famous for its long-life and durability. It's a bit expensive (the boardwalk mold had 410 grams of rubber and cost about $20 to make). That might not sound like much, but when you consider we've got 40+ molds... well, it adds up. We also have to be careful of that stiffness, as it can make it harder to de-mold smaller parts.
 |
| A look at the pump and the pot (vacuum chamber) |
The Green is the 2125 from MPK Enterprises. The company is run by a guy by the name of Mike, and he's one of the nicest and most helpful guys out there. You can reach him through his site at www.hobbysilicone.com. This particular silicone rubber is very flexible which makes it ideal for small parts like the awning posts you can see in the photo above. It also has the advantage of holding details very well. In addition to small pieces, we use it for some of the roofs, as the flexibility makes it easy to de-mold the large flat panels. Finally, it only runs about $10 a pound, so it's less expensive than the Alumilite.
The purple is the pleased spiritualist -- er, I mean "happy medium" between the two. We use MPK's Extra-Firm 135 because it's more flexibile than the Alumilite, but more rugged than the green. If I had to pick just one rubber to use for all occasions, I would choose the purple. Fortunately, I don't have to pick just one. As with any job, you need to use the right tool for the task at hand. Figuring out which rubber matches which mold master is a bit of an art, but I'm getting better at it.

Just as there are different molds for different situations, we use different resins for different applications. Come back next week and we'll talk more about why sometimes we use white resin and sometimes we use tan.
See ya then, amigos!
Thursday, April 12, 2012
Arnica Store (briefly) open...
Howdy from Arnica!
You’re getting this email because you have ordered from us in the past or you have asked to be placed on our mailing list. If you’re the former, thanks amigo! If you’re the latter, then welcome aboard!
I wanted to let you know that we’ve opened the shop for a few days to clear out some inventory (we made some buildings for a convention that we wound up canceling), so we have some pieces ready. We’re also ready to buy some more rubber so we can cast some new molds. Our plan is to duplicate the existing molds and ship them to Murphy so he and I can share the workload and, thus get more buildings out there. Plus, if he’s filling orders then I can focus on getting new stuff ready. This process is long overdue
The shop is open right now to accept orders. Every available item has a “Buy Now” button in front of it.
FAIR WARNING: There’s nothing new from the last time you ordered (sorry, but there are no adobe buildings available yet). I just wanted to give you first crack at ordering before we announce it to the general public.
Mike Mitchell
Hawgleg/Arnica
www.arnicarealestate.com
PS: If you have a discount coming to you from a previous order, please do NOT use the shopping cart to check out. Just send me a list of what you want and I will then send you a custom invoice from PayPal. It’s the best way for me to include your discount.
Thursday, April 5, 2012
WIP: Waiting for the Jury Prize Announcement
I had originally planned to announce the winner of the Showdowns & Shootouts Jury prize selection today, but that is not to be. As you will recall, the voting on the contest closed this past weekend, so we had our winner. It was actually a fairly close race, with the winner being decided by only three votes!
We sent an email to the winner but we haven't hear back from him. Since we don't want him to read about this before we've personally contacted him, we're going to put off this announcement until next week.
In the meantime, here's a sneak peak at the Work In Progress (WIP) illustration that will run with the story. Once again, I'm using Strata 3D CX6 to create this image. BTW: You might recognize the cowboy on top of the trophy as being the miniature that was in the bottom of last week's whiskey bottle image.

This image is still very rough (and, of course, I removed the winner's name from the plaque). So far, I'm mostly happy with the design (which, I must admit, is loosely inspired by my own Origins Award sitting on a shelf in my office). So far, I like the general shape, but there are some technical issues I need to resolve to make the image look better. For example, flat surfaces do not really look great with reflections. They tend to look lifeless and uninteresting. I may need to add some curvature to the name plaque, or get creative with my reflection maps in order to make this work.

Anyway, hope you enjoy this sneak peak of this image. Oh, and if you're interested in this sort of thing, here's a wire frame view to show you what the image looks like as raw geometry without the pretty textures applied. As you can see, there is a lot of detail on the cowboy figure, which was actually exported from Poser and placed in Strata 3D. It actually has a lot more detail than I need, but I don't feel its worth the hassle it would take to create a good, lower-polycount version of the model.
See you next week when we finally reveal the winner's name.
Tuesday, April 3, 2012
Gutshot Rotgut: Our Annual April Fools Joke
Yesterday was April Fools Day, and as I explained last week, I enjoy creating pranks for the holiday. Since 2006, Hawgleg Publishing has honored the spirit of the day by announcing the release of a fake product.
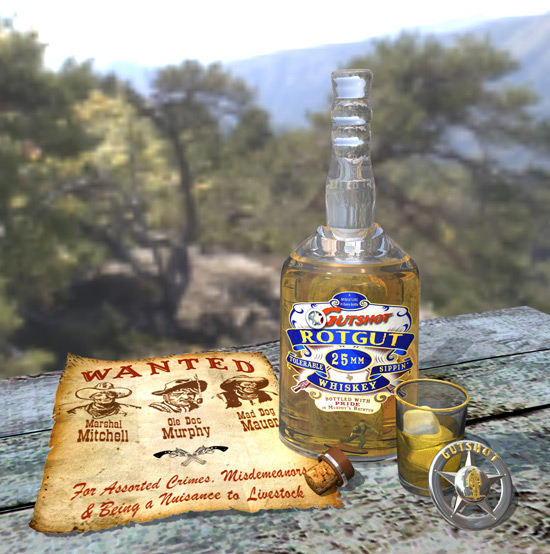
This year, our product was gaming-themed whiskey. That is to say, a boutique line of whiskey with a 25mm Western miniature in each bottle. We release the story at our Website (www.hawgleg.com) and TheMiniaturesPage. The story is a bit naughty, but for the most part it's workplace safe -- and it was a BIG hit at TMP. In fact, since April 1 fell on a Sunday, we were apparently the only company that took the time to create a joke (some years at TMP, there are easily a dozen fake products, but this year we were the sole provider, which actually helped us pull the wool over people's eyes more effectively than usual).
I also think the quality of our artwork helped sell the joke:
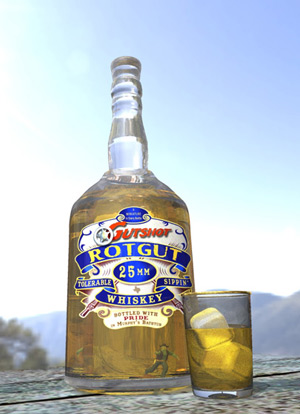
I created this image in Strata 3D, which is a 3D illustration program I've been working with for a long time (probably more than 10 years). It's a powerful, but lesser-known tool with a lot of horsepower there waiting to be unleashed -- as I hope you can see in these images.
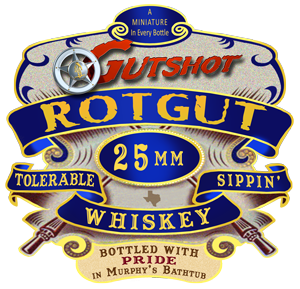
I think this time I came very close to achieving photo realism with these images. They're not quite 100% perfect, but they definitely do a good job of looking like real product artwork. I also got several complements on the quality of the label:
I even had a few people ask for a full-size label so they could print it out and put it on their own whiskey bottle. As one guy said, he wanted to see if anyone would notice. If you'd like to see the full-size label, you can get it by clicking here. I wish I could take all the credit for the label, but I did start off with an existing label from a Chivas Regal bottle. You can compare them by clicking here to see what I started with.
See ya Thursday!
Thursday, March 29, 2012
Gutshot Rules: Knocking the rifle off its throne
As I said last week, we solved one of our biggest problems in the first draft of Gutshot by arguing... er, discussing & debating outside Midnight Comics one night after a game. We invented the Retaliation Shot as a mechanism to solve one of the biggest problems we were having in the game: The fact that, because of our random initiative system, it was possible for you to die without ever firing s hot in self defense.
Reaction to that rule has been mixed, with most of it being positive. There are a small, vocal group of people out there who don't like it at all. Of course, these are the same people who would prefer that everyone write down their actions and display them at the same time and then act them out simultaneously. In other words, these are old-schoolers from the "orders" style of gameplay used with armies and divisions. This is absolutely, 100% not the type of game we wanted to make. Gutshot is a skirmish game, and that sort of detailed order-giving has no place in the undisciplined, wild-n-woolly world of Western gaming.
Another group that dislikes this mechanic is people who have never actually played it. Although we've written and re-written it more than once, it just doesn't sound like it will work as well as it does when you just read the words. It seems a bit... odd, or different to them. When they play it, though, most of them join the the people who love the Retaliation Shot because it does a whiz-bang job of fixing the imbalance caused by our chaotic initiative system.
Taking the rifle down a notch or two
But back to the rifle. As I said Tuesday, with the way the first draft of rules was written, there was no reason on god's green earth not to choose the rifle as your primary weapon. It had damage, range, and held 15 rounds. By any reckoning, it was the weapon to beat.
So, we had to do some things to make it a more balanced weapon. The first thing we did was eliminate the "to hit" bonus at point blank range. The rationale behind this is sound, but most people don't like it: We figure that if you're bringing a rifle right up to a fella with intent to shoot 'em, they will grab the barrel and try to shove it away or dodge it in any way he can. It's a simple idea, but it helps a lot.
The next thing we did was more severe: we made it impossible to draw and fire a two-handed weapon in the same Action. This had a profound effect on the game. Suddenly rifles and shotguns -- still the most powerful death dealers in terms or range and damage, respectively -- were more unwieldy than the nimble Colt revolver or the sneaky Derringer.
This was an amazing change to the game balance, and the point at which we realized -- over the next four or five playtests with the Midnight Riders -- that we were really on to something great! Suddenly the combat was more balanced and players had a reason to think about their weapon choices. Now we could turn our attention onto other issues.
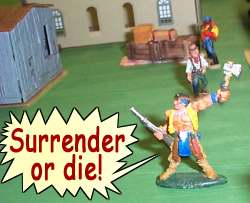
 |
| The Notorious Midnight Riders -- our first long playtest that helped shape the game into what it finally became. |
Another group that dislikes this mechanic is people who have never actually played it. Although we've written and re-written it more than once, it just doesn't sound like it will work as well as it does when you just read the words. It seems a bit... odd, or different to them. When they play it, though, most of them join the the people who love the Retaliation Shot because it does a whiz-bang job of fixing the imbalance caused by our chaotic initiative system.
Taking the rifle down a notch or two
 |
| From Bushwhacked in Beaver Creek! |
So, we had to do some things to make it a more balanced weapon. The first thing we did was eliminate the "to hit" bonus at point blank range. The rationale behind this is sound, but most people don't like it: We figure that if you're bringing a rifle right up to a fella with intent to shoot 'em, they will grab the barrel and try to shove it away or dodge it in any way he can. It's a simple idea, but it helps a lot.
The next thing we did was more severe: we made it impossible to draw and fire a two-handed weapon in the same Action. This had a profound effect on the game. Suddenly rifles and shotguns -- still the most powerful death dealers in terms or range and damage, respectively -- were more unwieldy than the nimble Colt revolver or the sneaky Derringer.
This was an amazing change to the game balance, and the point at which we realized -- over the next four or five playtests with the Midnight Riders -- that we were really on to something great! Suddenly the combat was more balanced and players had a reason to think about their weapon choices. Now we could turn our attention onto other issues.
Tuesday, March 27, 2012
Gutshot Rules: Retaliation Shots
Most of the time when you're working on a game as big as Gutshot, you don't exactly remember when and where certain rules came from. In the case of the Retaliation Shot, however, I remember when, where and -- most importantly -- why this rule came to be.
I recollect that it was a relatively mild summer evening in 2003. Paul Mauer and I were standing outside Midnight Comics in Houston, Texas. It was probably nearing 1 a.m. We had just finished running one of the highly successful playtests with the group known as the Midnight Riders. Now, the store was in its second location next to the Laser Quest and we were standing outside discussing and debriefing that night's game.
 I couldn't tell you exactly which game it was without diving back into my notes, but it was probably somewhere around game four or five: Buzzard Bait at Buzzard Point! or Bloodbath in Rio Gato! Even though the night air was relatively cool (for Houston in the summertime, that is), our discussion had heated up.
You see, we had a problem. More than that, there was something seriously broken in this version of the game. Right now, the "Rifle is god," as Murphy had put it. Under that draft of the rules, there was no reason on earth to select any other weapon but the rifle: it had range, it had a 15-shot magazine, and it dealt a wicked load of Damage that was only topped by the super-deadly shotgun. And we had another problem: because of our random initiative system, it was possible to die before you had a chance to fire your weapon, even when someone was shooting at you. In an IGOUGO game, you can't really do much until it's your turn (after all, it is I go, you go... you know?).
I also recall that Rio Gato was the game where it really came to head about how I was adamant that you could not split your movement: In other words, you can't move half, shoot, then finish moving. You need to move/attack or attack move. But that's another topic for another time.
The fact is, Paul and I were hot and upset because we each had different ideas on how to handle the dying-before-you-move and the rifle problems. We each suggested and then shot down each other's ideas until, at last something emerged: a slight break in the armor of the IGOUGO rule allowed for the person who is being shot at to instantly shoot back. Suddenly a light went on over our heads. This resolved the first issue, and (as it would turn out), this small change made the games deadlier and move faster.
I went home and wrote up some notes about the proposed change, and after much mulling it over, decided to call this mechanic the Retaliation Shot. Here's the actual text of the rule that wound up in the Gutshot Core Rule Book:
 There's some more text to explain certain limitations, of course. You can't use melee weapons, Two-Gun Shootists only get one Retaliation Shot, the weapon must have ammo in it, and so forth. The book also stresses that this is an optional shot. When someone shoots at you, you don't have to shoot back. Why wouldn't you, you might ask? Obvious things come into play: the shooter is out of range (he's got a rifle and you've got a pistol), or you just don't want to waste the bullet. I've also seen players balk at taking the shot if they can only hit their target with Boxcars. After all, statistically speaking, you've got as much chance of rolling Snake-eyes as you do of rolling Boxcars.
And trust me, that does happen!
Another interesting thing came out of this rule: We decided that all Damage is applied at the end of an Action. "This means that it’s possible for someone to shoot you and do enough Damage to kill you, yet you would still get to retaliate. And if ya do enough Damage to him in return, you might even take yer killer with yuh! Honestly, we’ve seen it happen plenty of times."
We quickly realized that this helped us recreate one of the classic elements seen in countless Westerns: Someone is blasted away in a hail of bullets, only to turn and manage to squeeze off that final, heroic shot at his killer, taking that varmint with him! It's classic, it's dramatic, and we love seeing it in a game.
So, this one night of bashing ideas back and forth with each other really helped shape Gutshot and turn it into the game it is today.
Mosey on back Thursday and I'll tell you
how we finally solved the "Rifle is God" problem.
I recollect that it was a relatively mild summer evening in 2003. Paul Mauer and I were standing outside Midnight Comics in Houston, Texas. It was probably nearing 1 a.m. We had just finished running one of the highly successful playtests with the group known as the Midnight Riders. Now, the store was in its second location next to the Laser Quest and we were standing outside discussing and debriefing that night's game.
You see, we had a problem. More than that, there was something seriously broken in this version of the game. Right now, the "Rifle is god," as Murphy had put it. Under that draft of the rules, there was no reason on earth to select any other weapon but the rifle: it had range, it had a 15-shot magazine, and it dealt a wicked load of Damage that was only topped by the super-deadly shotgun. And we had another problem: because of our random initiative system, it was possible to die before you had a chance to fire your weapon, even when someone was shooting at you. In an IGOUGO game, you can't really do much until it's your turn (after all, it is I go, you go... you know?).
I also recall that Rio Gato was the game where it really came to head about how I was adamant that you could not split your movement: In other words, you can't move half, shoot, then finish moving. You need to move/attack or attack move. But that's another topic for another time.
The fact is, Paul and I were hot and upset because we each had different ideas on how to handle the dying-before-you-move and the rifle problems. We each suggested and then shot down each other's ideas until, at last something emerged: a slight break in the armor of the IGOUGO rule allowed for the person who is being shot at to instantly shoot back. Suddenly a light went on over our heads. This resolved the first issue, and (as it would turn out), this small change made the games deadlier and move faster.
I went home and wrote up some notes about the proposed change, and after much mulling it over, decided to call this mechanic the Retaliation Shot. Here's the actual text of the rule that wound up in the Gutshot Core Rule Book:
10.5 Retaliation ShotIn general, when someone purposefully shoots at you, you may instantly shoot back with any ready weapon (see below). This return fire is called a Retaliation Shot and it is the only time you get to pull the trigger during someone else's Action.
A ready weapon is a weapon that is loaded and in your hand at the moment you were shot at. This includes all derringers, pistols, rifles, shotguns, and sawed-off shotguns. You may not draw the weapon or pick it up off a shelf (as in a siege situation). It must be in your hand, ready to be used when someone purposefully targeted you.
And trust me, that does happen!
Another interesting thing came out of this rule: We decided that all Damage is applied at the end of an Action. "This means that it’s possible for someone to shoot you and do enough Damage to kill you, yet you would still get to retaliate. And if ya do enough Damage to him in return, you might even take yer killer with yuh! Honestly, we’ve seen it happen plenty of times."
We quickly realized that this helped us recreate one of the classic elements seen in countless Westerns: Someone is blasted away in a hail of bullets, only to turn and manage to squeeze off that final, heroic shot at his killer, taking that varmint with him! It's classic, it's dramatic, and we love seeing it in a game.
So, this one night of bashing ideas back and forth with each other really helped shape Gutshot and turn it into the game it is today.
Mosey on back Thursday and I'll tell you
how we finally solved the "Rifle is God" problem.
Thursday, March 22, 2012
Gutshot Rules: Behind our random Initiative
As a game designer, I think one of the most important things you can do is to impose a sense of balance into the game mechanics. For every plus, there must be a minus. For everything that gives you power, there must be something to counteract it. From time to time I'm going to use this blog to explain some of the behind-the-scenes thinking that went into fine tuning some of the rules in Gutshot.
For example, here's a question I get asked at conventions a lot:
A fair question, and one with a very simple answer. But first, for those of you who are not that familiar with our game, here's an explanation of how initiative works in Gutshot:
"Why do you guys use random initiative? Why not just roll dice or draw cards and let everyone go in order?"
A fair question, and one with a very simple answer. But first, for those of you who are not that familiar with our game, here's an explanation of how initiative works in Gutshot:
- Each player creates a character and fills out a Character Sheet. Every character must have a name (sorry, but "Cowboy #1 in yellow shirt" is not a name)
- Each player writes the character's name on three slips of paper
- All the slips are placed into a hat or other suitable container (I actually had to stop using my cowboy hat because name slips kept getting caught under the rim -- nowadays I use the old gamer standby: the Crown Royal bag)
- One at a time, a name is pulled from the hat/bag: the character named then takes his action (usually movement and shooting at someone)
- This goes on, one at a time, until the hat/bag is empty. When that happens it is the End of the Turn.
- Refill the hat/bag with the names of surviving characters and keep on repeating until the end of the game.
 |
| Every Gamer's Friend |
Now, even a quick reading of that should make it apparent that your name is going to be pulled out in a completely random manner. You might even have two Actions in a row... or all three at the end of the Turn. Critics of this system argue that this cuts down a LOT on planning and coordination because you can't easily predict exactly when a character is going to have his name drawn. And that, saddle pals, is exactly what we like about it!
Let me go back in time and set the stage for you...
Way back in 1999 and 2000 when Mike Murphy sent me the first drafts for this game, I was NOT impressed by the initiative system he described. I came from a long and checkered past as an RPGer (D&D, Vampire, etc.) and I was used to the simple: "roll dice and let's go in order" method of doing things. Murph strongly suggested I playtest it the way he wrote it... and I did. And I wasn't super impressed for a few reasons, the main one being that it was possible for me to die without ever firing a shot or moving to defend myself. So, naturally, I tried it again with a simple, orderly initiative system. And it worked... but too well.
Now that the players knew who was going when -- and more importantly, that everyone would only get one Action in a row), they suddenly started using modern combat tactics like advancing in waves and securing entry/exit points. It was highly efficient... and not at all a Western. That type of initiative was just too predictable, which is why we went back and figured out how to fix the I-never-even-got-to-move-before-I-died problem. This improvement would end up being The Retaliation Shot...
And we'll talk more about that next week.
Subscribe to:
Posts (Atom)